Haiku ARM64 on a Raspberry Pi 4
 DigitalBox
- Dev
- October 19, 2026
There is a special kind of silence that only developers know: the one you get when you boot a brand-new OS on a board and the serial console says absolutely nothing.
I spent a good part of last week listening to that silence on a Raspberry Pi 4. :)
Why this experiment
Haiku on ARM64 already boots to the desktop in QEMU. That is a real milestone for the project.
But an emulator is forgiving. Real hardware is not: real memory maps, real device trees, real firmware and real quirks.
So I asked myself a simple question: how far can Haiku ARM64 go on a real Raspberry Pi 4 today?
The short answer: it boots into the kernel debugger.
No desktop, no disk, no keyboard, and only one CPU.
But getting there taught me a lot, and it is a solid place to start from.
In this article I will show you:
- How I built the ARM64 image from Haiku x86_64
- The walls I hit: a loader panic, then total silence
- What is still missing, and where help would be welcome
A small disclaimer: this is an experiment, not a tutorial for a working system.
If you want a desktop on your Pi, you are not there yet. If you like to see how things work from the inside, read on.
I did not find a public write-up of this exact state, but I may have missed one. If you know of one, please let me know.
The two fixes shown here are local patches I used for testing. They are not submitted to the Haiku tree.
The hardware setup
- A Raspberry Pi 4 Model B, 4 GB
- A USB-to-TTL serial cable: DSD TECH SH-U09BL, with a CP2102N chip. It works at 3.3 V, which is what the Pi’s GPIO pins expect (GND, TX, RX)
- A laptop running Haiku x86_64: used for building and for preparing the SD card and for the serial console (a plain terminal at 115200 baud)
- An SD card (with a USB adapter)
- A tiny HDMI screen (optional for debugging)
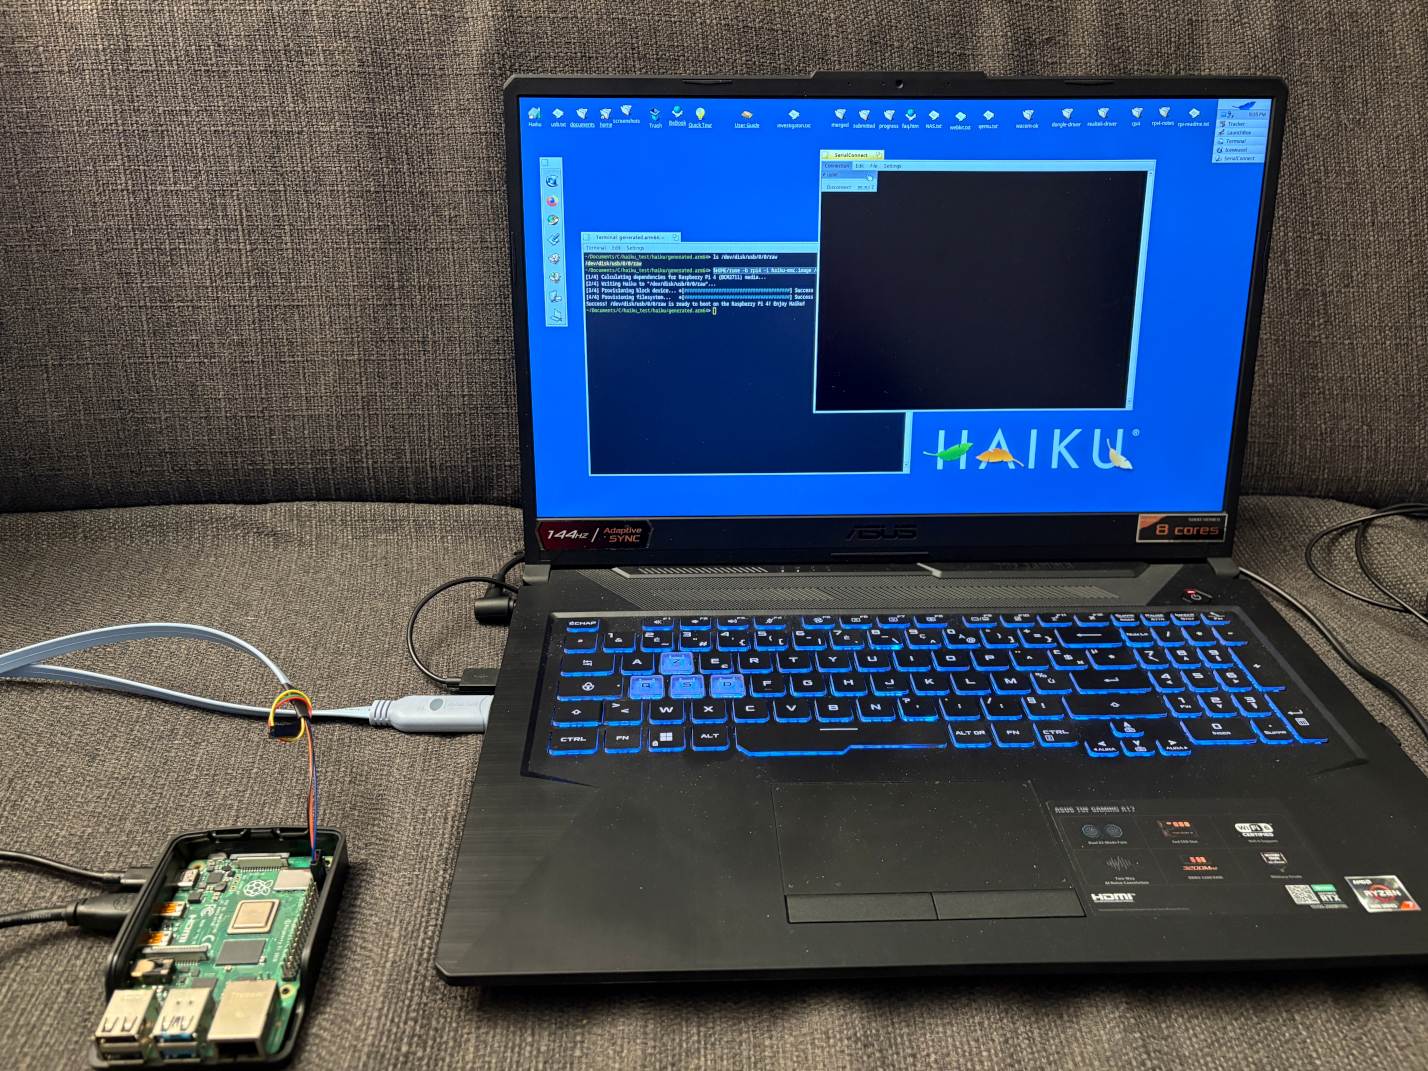
The serial cable is the key piece. On a board with no working display driver, it is your only window into the machine. Do not start without one.
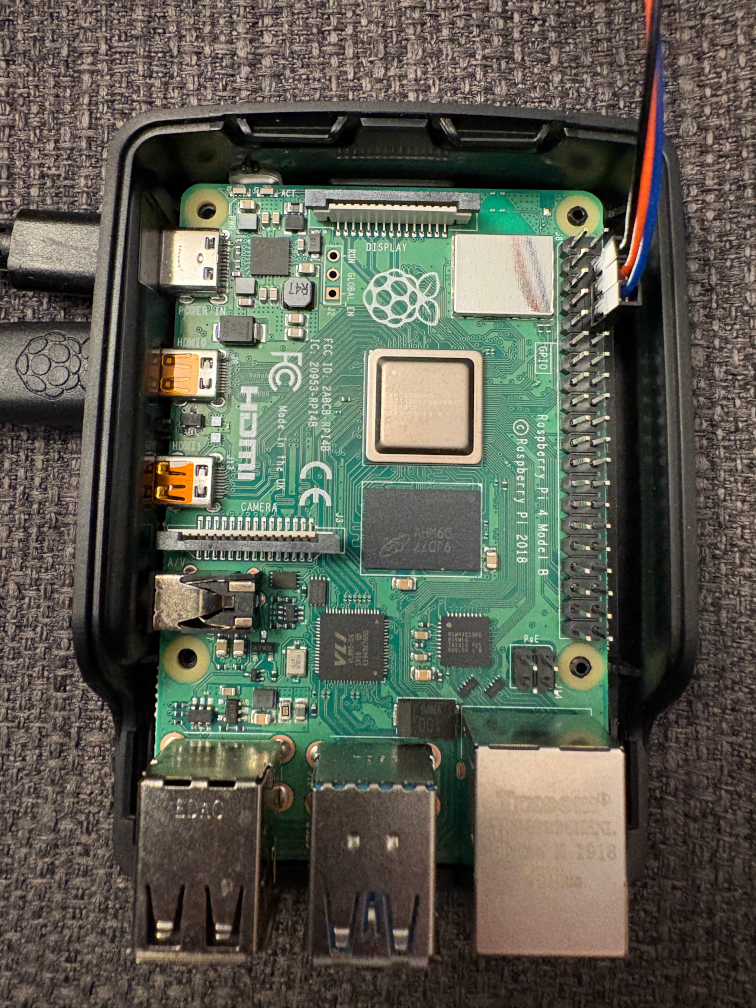
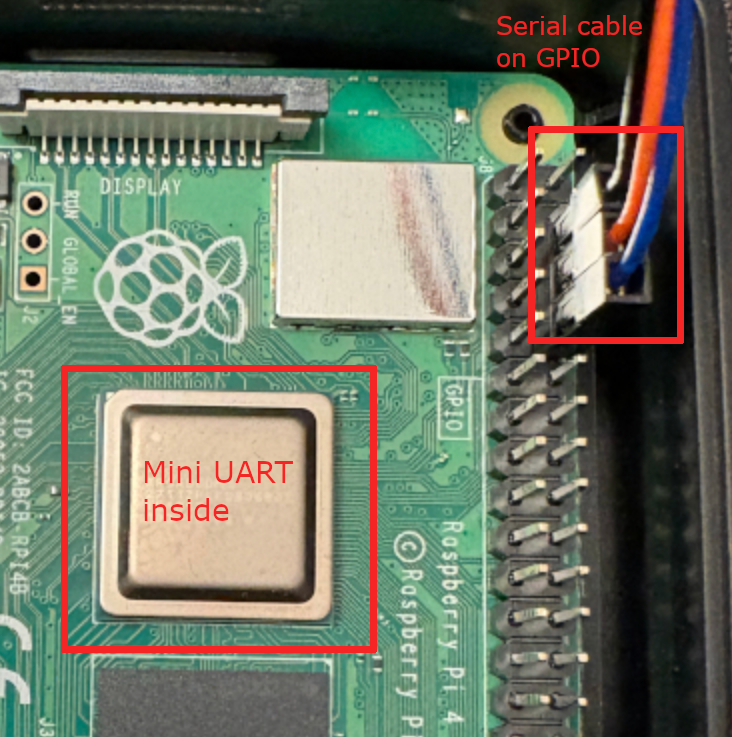
You will need to plug the GND, TX, RX wires to the Raspberry GPIO as below:
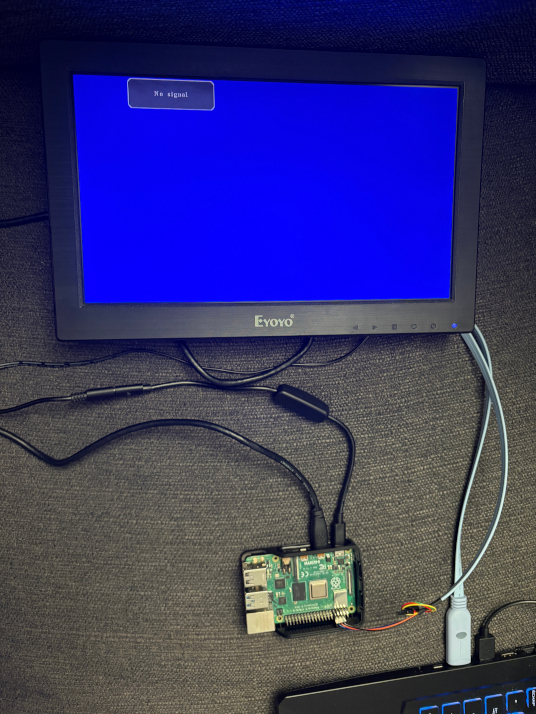
I have also plugged a tiny HDMI screen to the Raspberry Pi, but this is optional in the setup:
The software setup
- Haiku sources, ARM64 target, built with
jam - Rune, the tool that injects the board boot files into the image
- U-Boot, loaded by the Pi's VideoCore firmware
- The Raspberry Pi firmware files (
start4.elf,fixup4.datand friends)
The boot configuration is short.
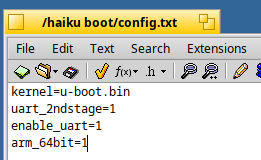
In config.txt, the important lines are:
arm_64bit=1
kernel=u-boot.bin
Please note that I have used the latest Haiku sources from the master branch.
Building the image from Haiku
The first question was: can I build Haiku ARM64 from Haiku x86_64?
The answer is simple: Yes.
I followed the official cross-compilation instructions, configured the tree for ARM64, and ran:
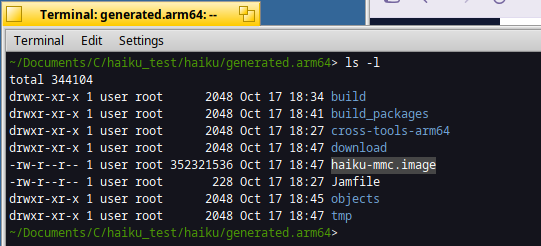
jam -j2 -q @minimum-mmc
The result is the below mmc minimal image corresponding to Haiku ARM64:
Writing the image to SD card
Then I wrote the image to the SD card and let Rune add the Raspberry Pi boot files.
Download Rune software from the below GitHub repository: https://github.com/haiku/rune/releases/
Put it in your $HOME directory and insert the SD card into your machine.
The SD card should be recognized under /dev/disk/usb/0/0/raw but check on your system if it's the case, as the number after "usb" can be different.
Launch from the Terminal the below command:
$HOME/rune -b rpi4 -i haiku-mmc.image /dev/disk/usb/0/0/raw
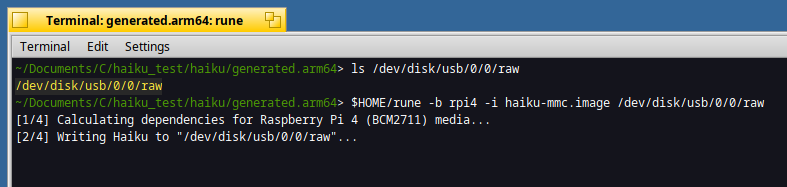
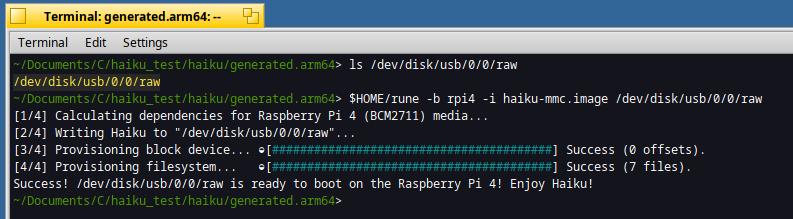
It should be completed with the below message:
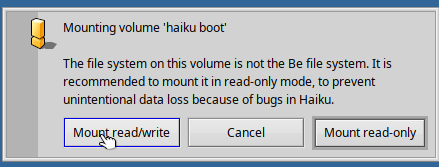
Now unplug the SD card and insert it again.
Confirm the mount of the card with "Mount read/write"
Open the "config.txt" file:
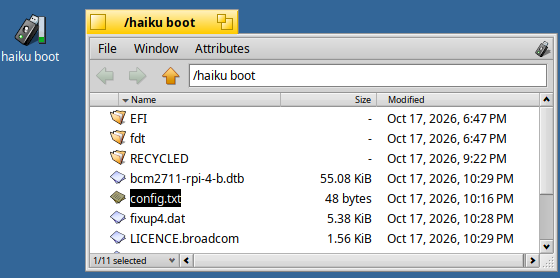
And update it by adding a last line with "arm_64bit=1":
The SD card is now ready for testing!
The boot chain in one picture
Before the walls make sense, you need the map.
On a Pi 4 the boot goes through four stages, and each one hands over to the next.
- VideoCore. The Pi’s graphics processor starts first, before the ARM CPU. Its firmware reads config.txt, which tells it to run u-boot.bin.
- U-Boot. A small boot program. It loads the Haiku loader from the SD card (the BOOTAA64.EFI file) and hands over to it.
- Haiku loader. It prepares everything the kernel needs: the page tables, the mapping of the serial port (the UART), and the boot icons on screen. Then it starts the kernel.
- Kernel. kernel_arm64, the Haiku kernel itself, takes over.
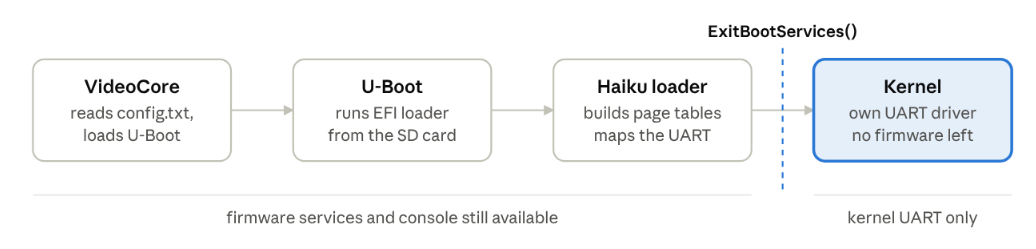
The first three stages run while the firmware is still alive, so they can print through its console.
At ExitBootServices() the loader gives the firmware up, and from that moment the kernel is on its own.
Keep this boundary in mind: the whole second half of this story happens right on it.
Booting the Pi4
Before launching the Raspberry Pi, open the SerialConnect application.
Two things to do:
- Connect to the USB-to-serial cable via Connection>usb0
- Redirect the output to a log file via File>Log to file (in addition to the console of the application)
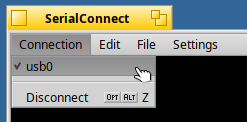
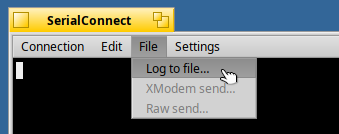
Then boot the card by switching to power on the Raspberry Pi:)
First wall: the loader panic
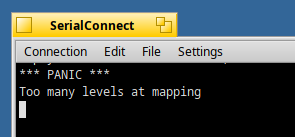
U-Boot started, the Haiku loader started, and then the serial console gave me this:
PANIC: Too many levels at mapping
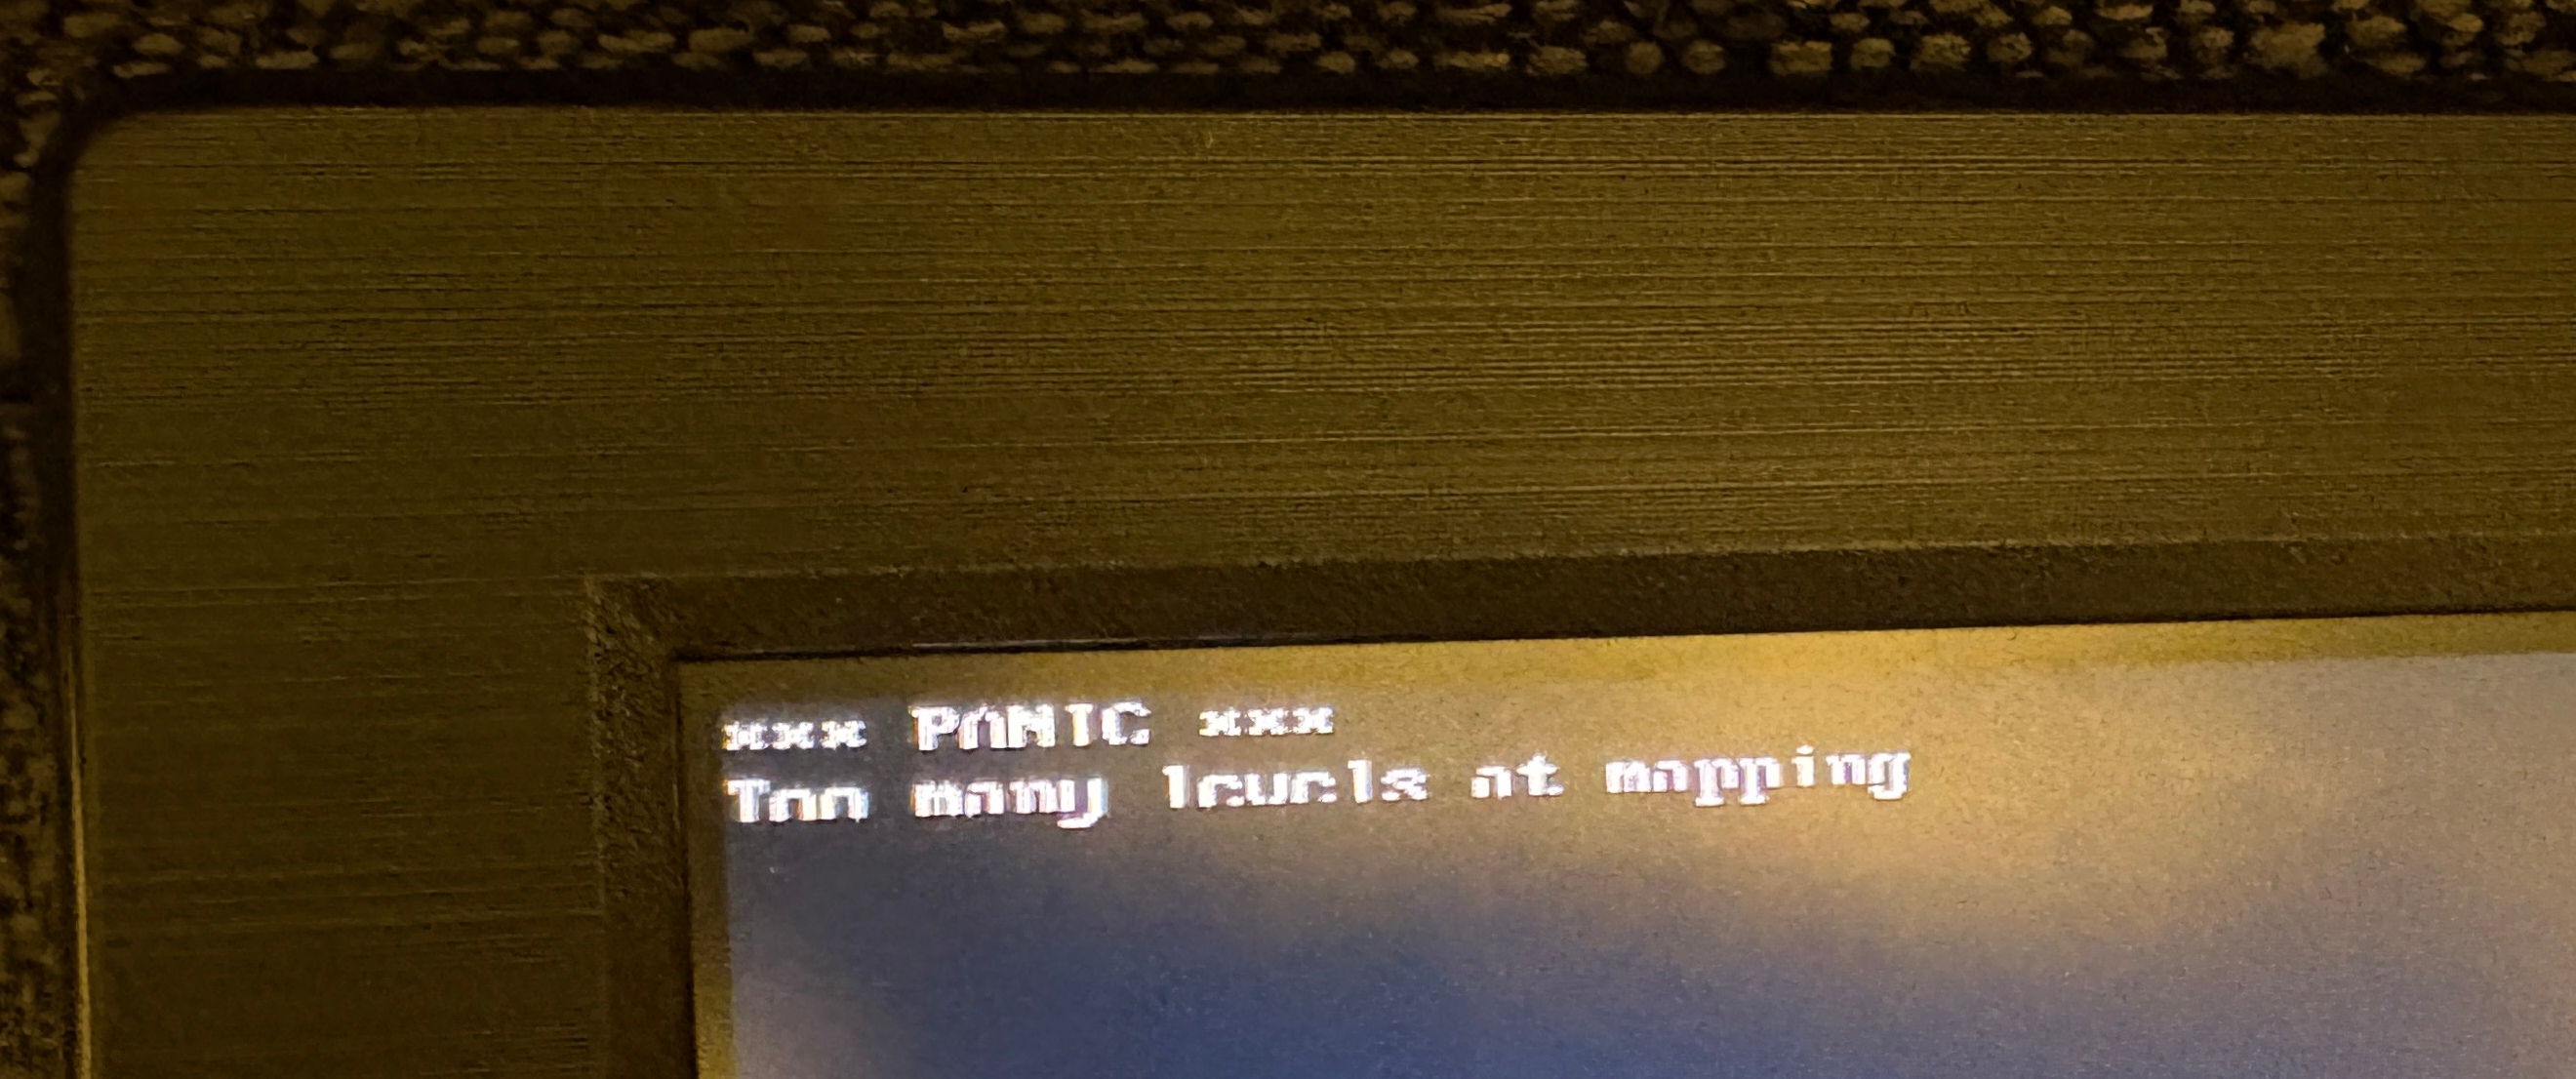
The HDMI display gives also the same result:
What was going on
Before it hands control to the kernel, the EFI loader builds the page tables the kernel will start with. Among other things, it maps the registers of the debug UART (Universal Asynchronous Receiver/Transmitter), the serial port Haiku’s kernel uses to print messages very early in boot, so the kernel can talk on the serial line before any normal driver exists.
On the Pi 4, the debug UART is the mini-UART, a simple serial port built into the Pi’s chip. Its registers start at 0xfe215040.
Memory is mapped in whole pages of 4 KiB (0x1000), so a page always starts at an address ending in 000. The UART does not: it sits 0x40 bytes after the start of its page. The loader passed that mid-page address to its mapping code, which did not expect it, and gave up with the panic above.
The fix is to map the whole page and remember the 0x40 offset, so that the kernel can still find the right register.
The fix
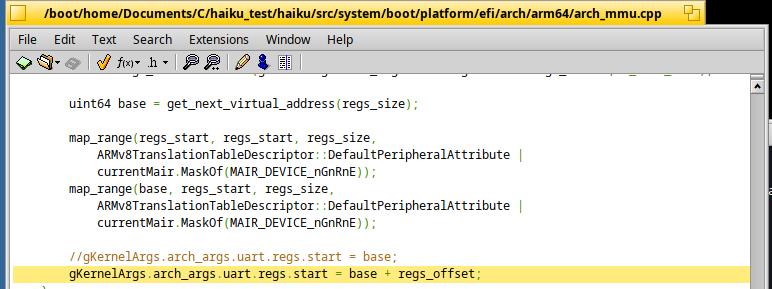
The idea is simple: round the start address down to the page boundary, remember the offset, and add it back to the address handed to the kernel. The size is rounded up to cover the offset.
In src/system/boot/platform/efi/arch/arm64/arch_mmu.cpp:
uint64 regs_start = ROUNDDOWN(gKernelArgs.arch_args.uart.regs.start, B_PAGE_SIZE);
uint64 regs_offset = gKernelArgs.arch_args.uart.regs.start - regs_start;
uint64 regs_size = ROUNDUP(gKernelArgs.arch_args.uart.regs.size + regs_offset, B_PAGE_SIZE);

// ... map regs_start, regs_size ...

gKernelArgs.arch_args.uart.regs.start = base + regs_offset;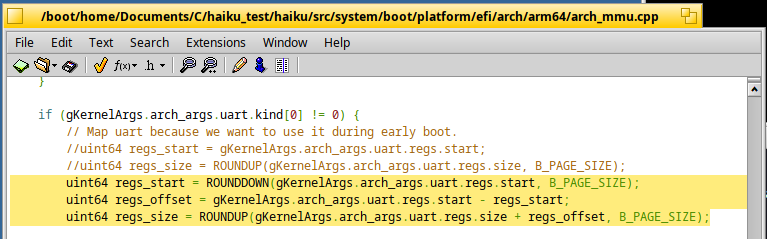
We can now rebuild the loader:
jam -j2 -q @minimum-mmc
Then the new haiku_loader.efi can be copied to the FAT partition of the SD card:
cp objects/haiku/arm64/packaging/packages_build/minimum/hpkg_-haiku_loader.hpkg/contents/haiku_loader.efi /haiku\ boot/EFI/BOOT/BOOTAA64.EFI
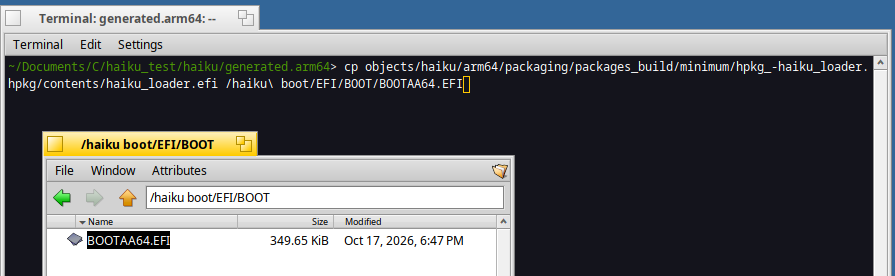
Once we boot again: the panic is now gone!
This is a local patch for testing, not submitted upstream. It is enough to get the loader past the panic.
Second wall: silence after ExitBootServices
With the loader patched, things looked better.
The loader ran to the end, and the screen showed the Haiku boot icons, all greyed out.
And then nothing:
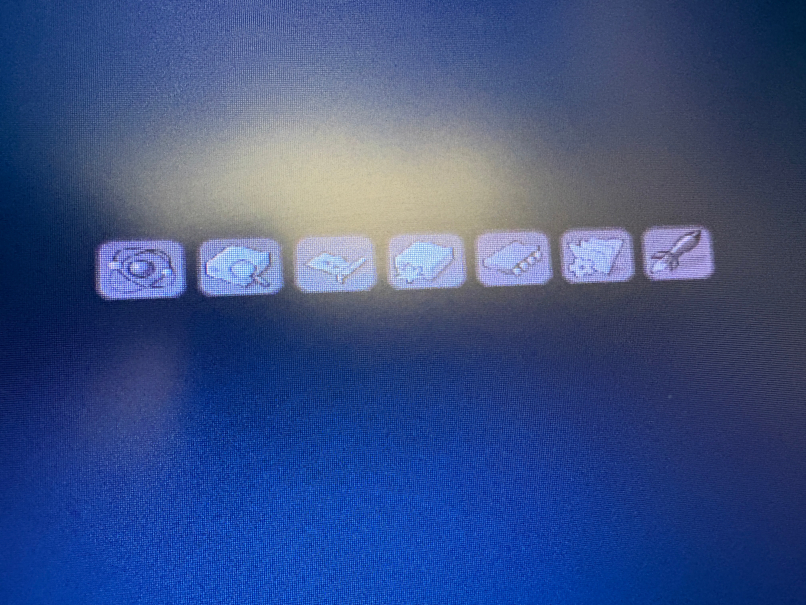
No text, no panic, no sign of life on the serial console after ExitBootServices()
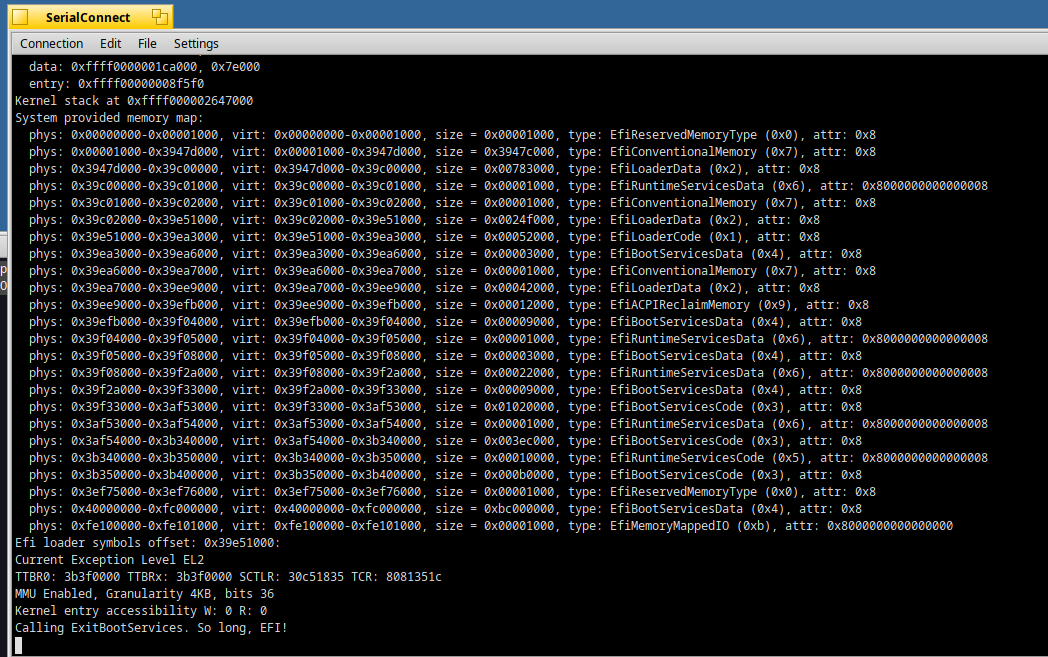
Up to a certain point, the loader prints through the firmware.
At the end it calls ExitBootServices().
After that call the firmware is gone, and so is its console. From then on, the only code that can talk to you is the kernel, through its own UART driver.
Where does it stop?
After a few debugging / analysis, I came to the conclusion that the kernel waits until every CPU has arrived.
To see where the kernel stops, I added a few one-character markers that write straight to the UART. With four CPUs, I only saw the first two, then nothing: the kernel was waiting for the other cores.
And it does so before the kernel's normal debug output has even started.
That is the silence.
It was not a broken UART. It was a kernel waiting for cores that never wake up.
The loader is responsible for waking the other cores. The kernel only waits for them at a meeting point early in its startup.
The proof came from the opposite experiment: I forced the loader to start a single CPU (sCpuCount = 1, a local test).
One CPU only patch
In the arch_smp.cpp file add the below line at the start of the arch_smp_init_other_cpus() function:
sCpuCount = 1; // force single CPU
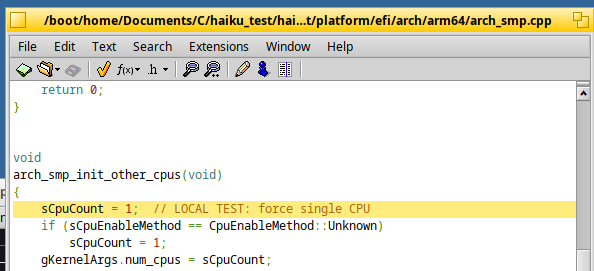
Then generate the image again:
jam -j2 -q @minimum-mmc
And copy the corresponding file to the SD card:
cp objects/haiku/arm64/packaging/packages_build/minimum/hpkg_-haiku_loader.hpkg/contents/haiku_loader.efi /haiku\ boot/EFI/BOOT/BOOTAA64.EFI
At this stage, why the secondary cores do not wake up is a different question.
Result: the kernel debugger on a Pi 4
Once I knew the kernel was alive, the next step was to let it speak with its own voice.
With the debug output working, the boot log scrolled on the terminal, and the system ended in the Haiku kernel debugger prompt!
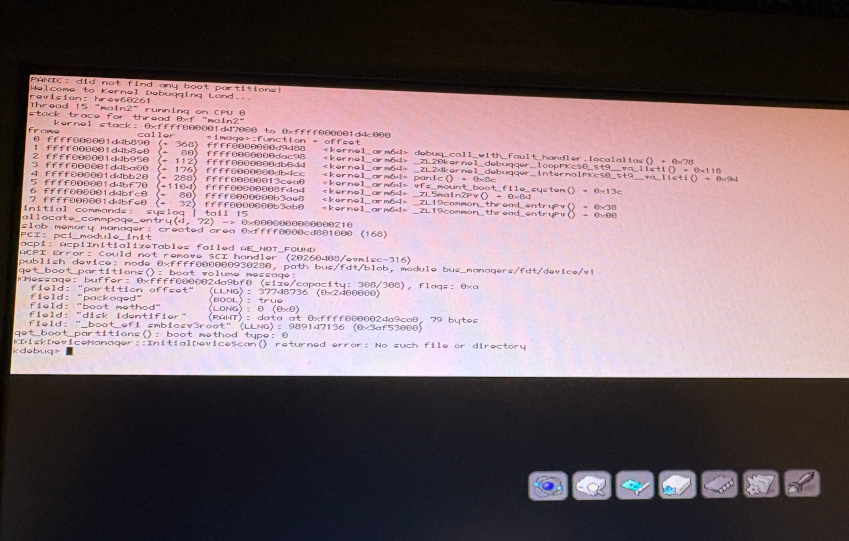
I have to admit, I stared at that prompt for a while.
For me this is the real milestone of the experiment: Haiku ARM64, running on a real Raspberry Pi 4, and answering my commands.
The same is displayed in the log file from the SerialConnect application:
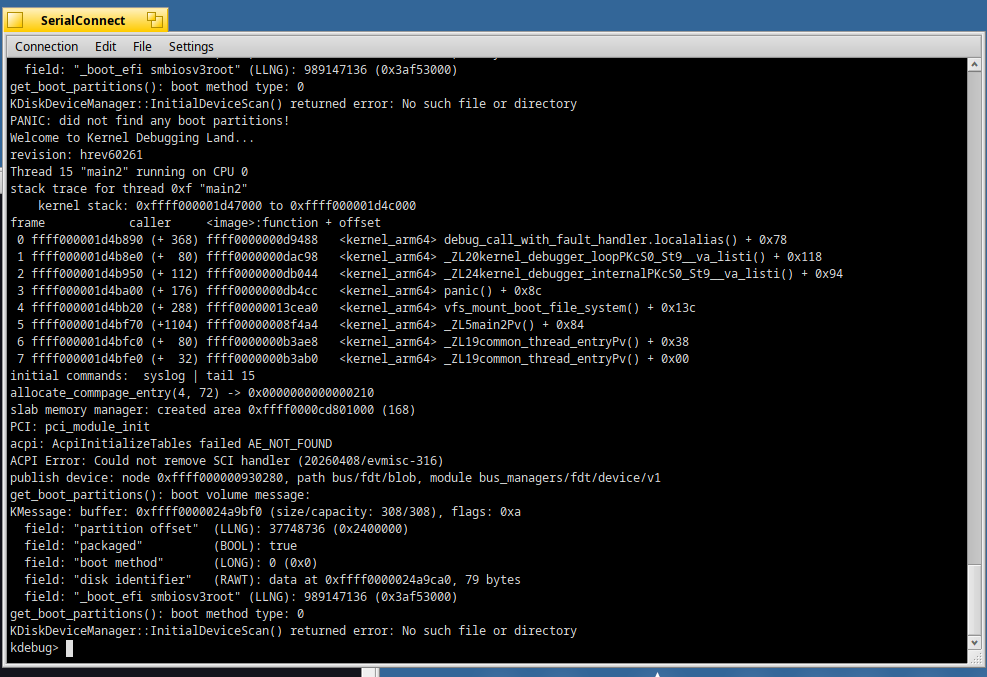
Looking around
A kernel debugger is a great way to explore a young port.
I typed help first, then a few commands:
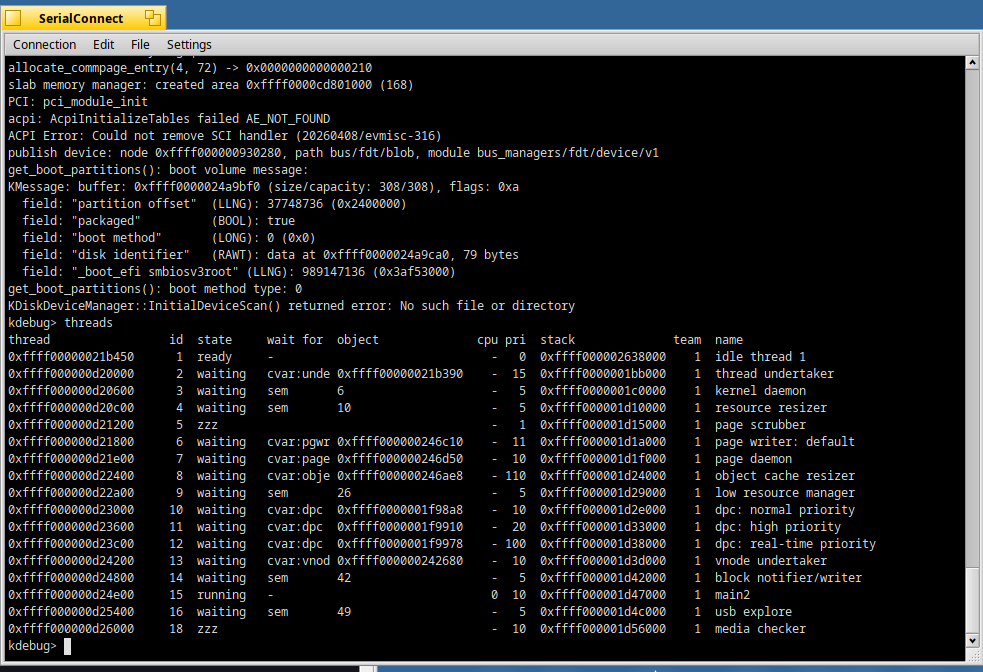
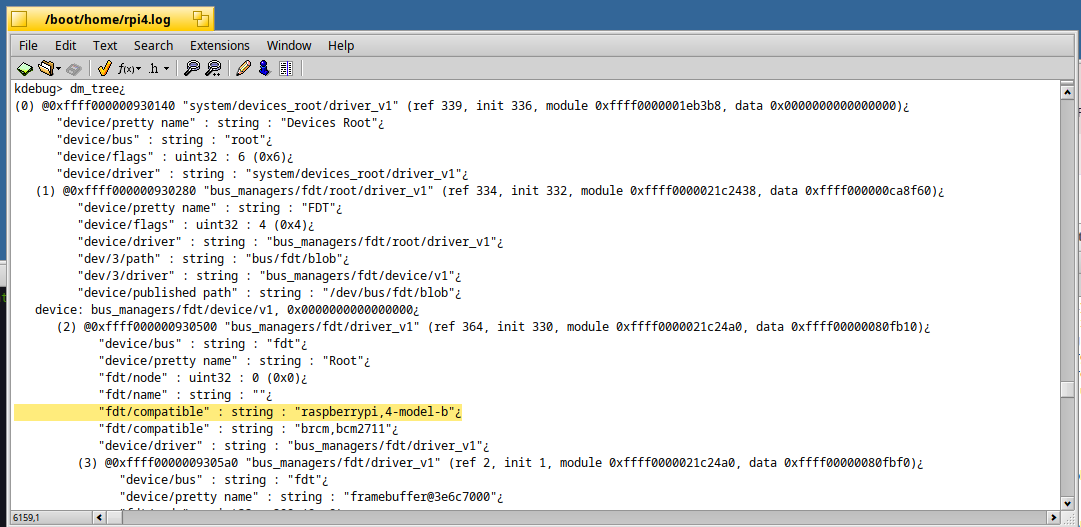
threadslists the kernel threads. It works, and it shows the system is scheduling.syslogprints the messages the kernel logged during boot, including the ones emitted before any console existed.dm_treeshows the device manager tree: which devices the kernel found, and which drivers attached to them. The output is long, so I have opened the log file from SerialConnect in Pe editor
Below are the available threads running on the Raspberry Pi 4:
The dm_tree kernel command identifies the Raspberry Pi4 as a Model B:
What this proves
- The loader, the page tables and the handoff to the kernel work on this board.
- The kernel starts, runs its early initialization, and schedules threads.
- The serial console is a reliable way to work, in both directions.
What it does not give you is a desktop.
The kernel has no driver yet for the SD card controller, so it has nowhere to load the system from.
A kernel debugger on a Pi 4 may sound small. But every other piece of the port, storage, USB, networking, more CPUs, will be built on top of it.
What is still missing
- The secondary CPU cores do not wake up (my guess is a cache problem, but this is a hypothesis).
- No driver for the SD card controller. The log ends with PANIC: did not find any boot partitions!.
- No USB: the keyboard sits behind a PCIe USB chip, which needs its own driver first.
Want to try it?
If you have a Pi 4 and a 3.3 V serial cable, you have everything you need:
- Build Haiku ARM64 from
master, - Apply the 2 fixes shown above,
- Boot with U-Boot and watch the serial console.
If you get further than I did, or you already know why the secondary cores stay asleep, or you have written SDHCI or PCIe drivers for Haiku, I would really like to compare notes.
I hope you have found this article useful :)
And if you are curious about the Haiku ARM64 port, I can only recommend getting a serial cable.
There is something very satisfying about the first line of text coming out of a kernel that was silent a minute before.
Useful links
- BCM2711 ARM peripherals: https://pip-assets.raspberrypi.com/categories/545-raspberry-pi-4-model-b/documents/RP-008248-DS-1-bcm2711-peripherals.pdf
- Raspberry Pi 4 / Haiku internal documentation: https://www.haiku-os.org/docs/develop/kernel/arch/arm/rpi4.html