
Making room for Haiku
 DigitalBox
- Tips
- October 26, 2026
Freeing up space on your Windows partition
Want to try Haiku without giving up Windows?
The first step is to make room on your disk.
Fortunately, you don't need to wipe anything: you can shrink your Windows partition and install Haiku next to it.
Use case
My laptop has a single 1 TB SSD, almost entirely used by Windows (one big `C:` partition).
I want to install Haiku on it and keep Windows for the few things that still need it.
The plan is simple:
- Shrink the Windows partition to free some space.
- Install Haiku in this free space.
- Choose the system to boot at startup.
This article covers the first step, which is the one that scares most people.
Before you start
Resizing a partition is safe most of the time, but it is still a risky operation.
A power cut at the wrong moment can corrupt your data.
So take some time to back up your important files on an external drive.
If your disk is encrypted with BitLocker (common on Windows 11, where it is sometimes enabled automatically as “Device encryption”), suspending it is not enough: GParted cannot resize a BitLocker-encrypted partition. You need to fully decrypt the drive first.
Open a Command Prompt as administrator and check the status:
manage-bde -status C:If the volume is encrypted, turn BitLocker off:
manage-bde -off C:Decryption runs in the background and can take a while on a large disk. Wait until manage-bde -status C: reports “Fully Decrypted” before going further.
Know how much space Haiku needs: a minimal install fits in a few GB, but I recommend at least 30 to 50 GB.
You will install packages, ports and development tools, and Haiku is fun to experiment with.
Preparing Windows
Windows tends to leave its filesystem in a "not quite clean" state, which prevents any tool from shrinking it properly. Let's fix that.
1.Disable Fast Startup and hibernation
Fast Startup puts the NTFS partition in a hibernated state, and tools like GParted will refuse to touch it.
Open a Command Prompt as administrator and run:
powercfg /h off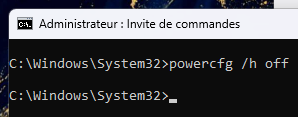
Then shut down Windows completely (not restart).
2. Check the filesystem
Still in an administrator Command Prompt:
chkdsk C: /fWindows will ask to schedule the check at next reboot.
Accept, and restart.
3. Clean up
The more free space you have inside Windows, the more you can reclaim. Run Disk Cleanup, uninstall what you don't use, and empty the recycle bin.
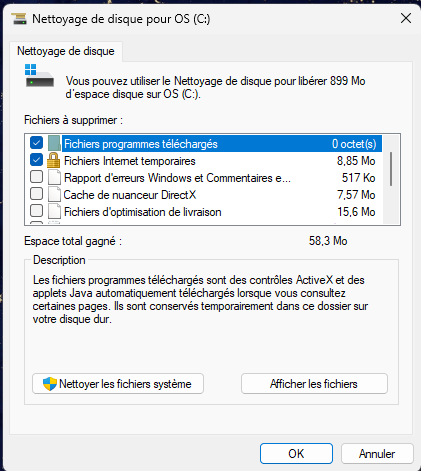
If you have a lot of large files you can't remove, move them to an external drive for now.
Shrinking with GParted
GParted is a flexible tool to shrink partitions.
So let's create a live USB.
Download the GParted Live ISO from https://gparted.org/download.php and write it to a USB stick with a tool such as Etcher, Rufus or `dd`.
Secure Boot: on some machines, the GParted Live USB stick will not boot while Secure Boot is enabled. If your stick does not show up in the boot menu or is rejected at startup, enter your firmware settings (UEFI/BIOS) and disable Secure Boot.
Note that Haiku’s bootloader is not signed for Secure Boot either, so you will need to leave it disabled to boot Haiku later.
Do this after decrypting BitLocker: changing the Secure Boot setting on an encrypted disk can trigger a BitLocker recovery prompt at the next Windows startup.
Boot on GParted.
Restart your computer, open the boot menu (usually `F12`, `F9`, `Esc` or `F2` depending on the manufacturer) and select the USB stick.
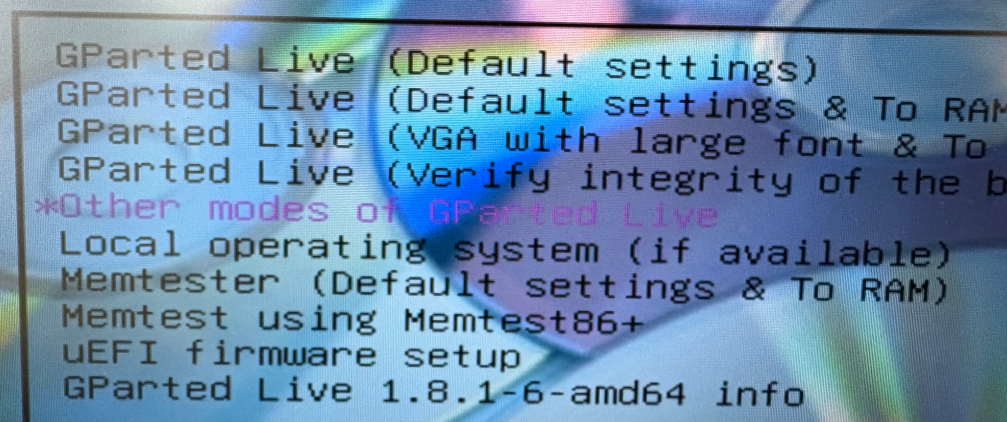
In the GParted startup screen, select "Other modes of GParted Live":
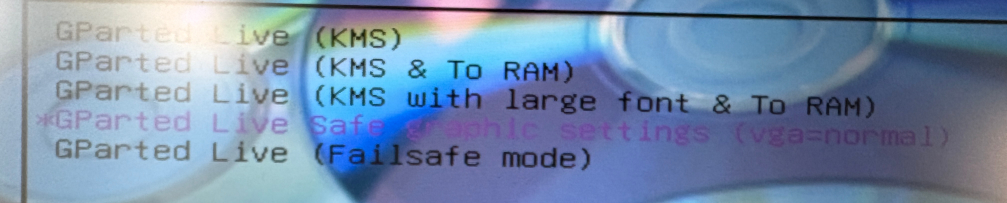
Then select the GParted Live Safe graphic settings:
After that, accept the default options until the graphical interface appears.
Resize the partition
Click on GParted application on the desktop.
1. Select your Windows disk at the top right (often `/dev/nvme0n1` or `/dev/sda`).
2. Right-click the big NTFS partition and choose Resize/Move:
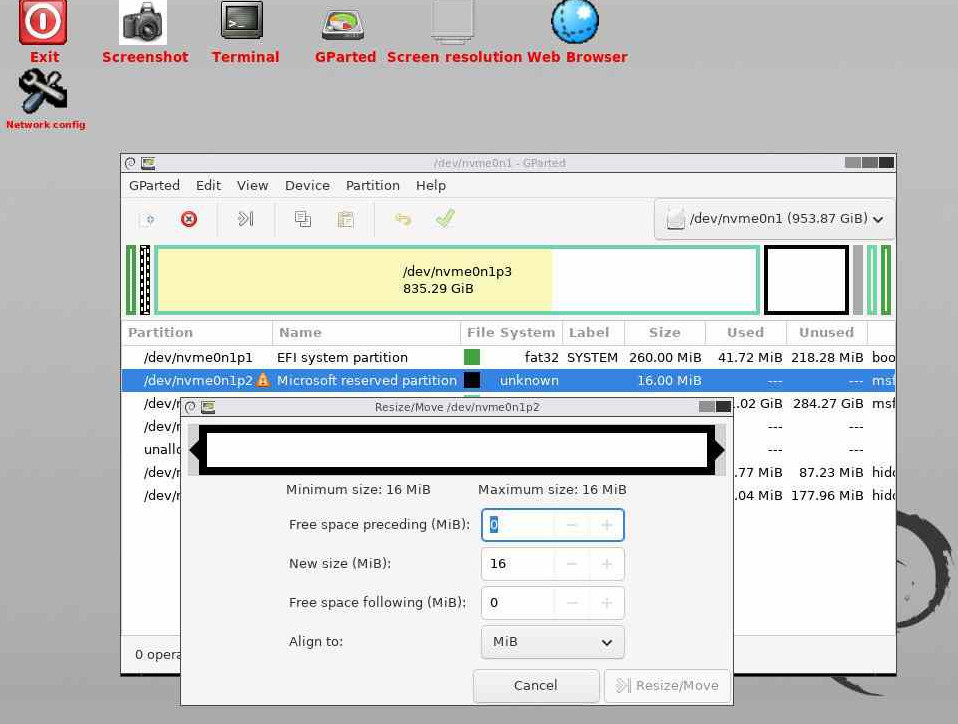
3. Drag the right handle to the left, or type the amount in the Free space following (MiB) field.
4. Click Resize/Move.
Nothing happens yet: GParted only queues the operation.
5. Click the green check mark (Apply all operations) and confirm.
Be patient: shrinking a big NTFS partition can take several minutes.
Never interrupt it.
You should then have unallocated free space to use (below screenshot already contains an installed Haiku partition):
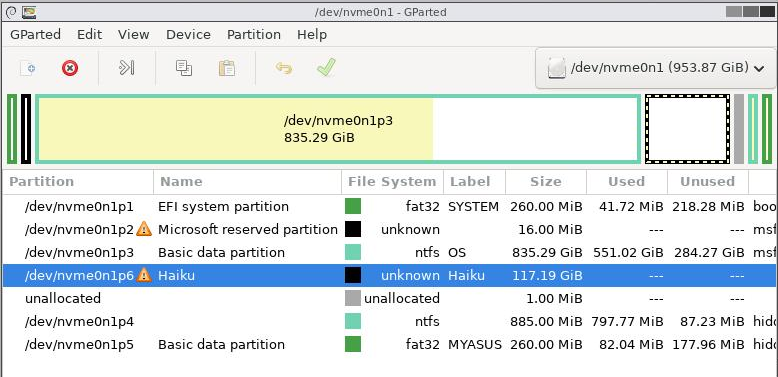
Leave the space unallocated
You may be tempted to create the new partition directly in GParted.
Don't: GParted doesn't know how to create a Haiku (BFS) partition.
Just leave the space unallocated. Haiku's installer will take care of it.
Don't touch the other partitions
On a modern machine you will also see a small FAT32 EFI System Partition and a few small Microsoft partitions (Recovery, Reserved).
Leave them alone.
Windows needs them to boot, and the EFI partition will also be useful for Haiku.
Back to Windows
Before going further, reboot into Windows once.
It may run a disk check after the resize: let it finish.
Then confirm that everything works as before.
If it does, you are ready for the next step.
Installing Haiku
You now have free space on your disk for Haiku!
This article won't give you all the steps to install Haiku from a USB stick.
The important point is that during installation, DriveSetup can be used to initialize the free partition into Be File System format:
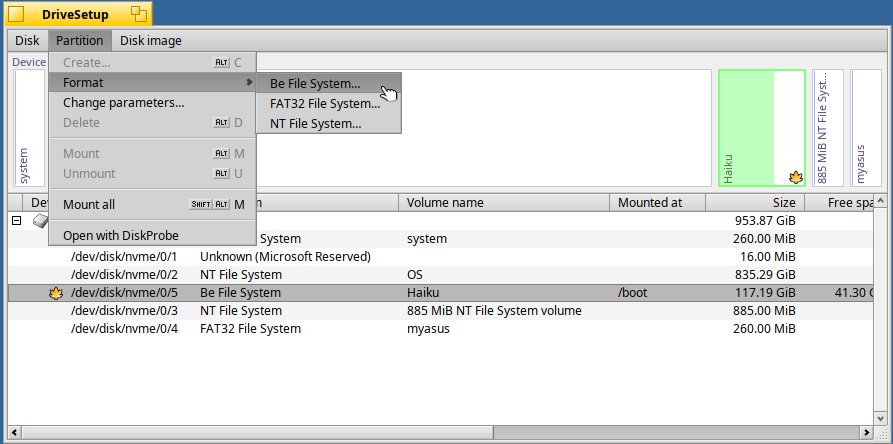
The installer will then do the rest :)
Happy hacking with Haiku.